Maze Wasm in Rust实现WASM边缘计算
迷宫生成
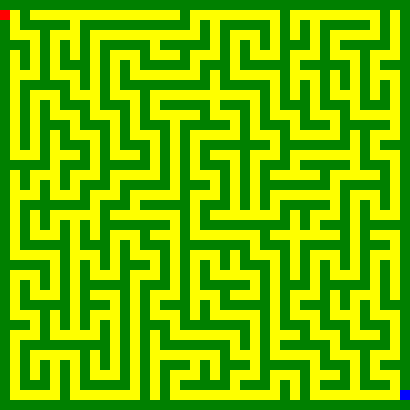
突然想做一个生成迷宫的游戏给小朋友玩,于是就开始整。就大概是下面这样的,唯一需要考虑的就是必须有一个从入口到出口的路径。
一开始的想法是把迷宫用字符数出来,墙就采用黑色方块字符,路径就用空个字符。几下子小朋友就觉得黑窗口里面的字符太丑。然后就考虑是不是用JavaScript在浏览器中绘制,会不会好看一些。、
  1<!doctype html>
  2<html lang="en-US">
  3
  4<head>
  5    <meta charset="utf-8" />
  6    <title>迷宫生成器</title>
  7    <link rel="stylesheet" href="maze.css">
  8</head>
  9
 10<body>
 11    <div class="controls">
 12        <div class="control-group">
 13            <label>迷宫尺寸: <input type="number" id="mazeSize" value="41" min="5" max="99" step="2"></label>
 14            <button id="generateMaze">生成迷宫</button>
 15            <button id="downloadMaze">下载迷宫</button>
 16        </div>
 17        <div class="control-group">
 18            <div class="color-picker">
 19                <label for="wallColor">墙颜色</label>
 20                <input type="color" id="wallColor" value="#008000">
 21            </div>
 22            <div class="color-picker">
 23                <label for="pathColor">通道颜色</label>
 24                <input type="color" id="pathColor" value="#FFFF00">
 25            </div>
 26            <div class="color-picker">
 27                <label for="startColor">起点颜色</label>
 28                <input type="color" id="startColor" value="#FF0000">
 29            </div>
 30            <div class="color-picker">
 31                <label for="endColor">终点颜色</label>
 32                <input type="color" id="endColor" value="#0000FF">
 33            </div>
 34        </div>
 35    </div>
 36    <div class="maze-container">
 37        <div class="progress">生成中...</div>
 38        <canvas id="canvas"></canvas>
 39    </div>
 40    <script type="module">
 41        import { Maze, Cell } from './maze-js.js';
 42
 43        // 获取DOM元素
 44        const canvas = document.getElementById('canvas');
 45        const ctx = canvas.getContext('2d');
 46        const mazeSizeInput = document.getElementById('mazeSize');
 47        const generateButton = document.getElementById('generateMaze');
 48        const downloadButton = document.getElementById('downloadMaze');
 49        const progress = document.querySelector('.progress');
 50        const wallColorInput = document.getElementById('wallColor');
 51        const pathColorInput = document.getElementById('pathColor');
 52        const startColorInput = document.getElementById('startColor');
 53        const endColorInput = document.getElementById('endColor');
 54
 55        // 设置画布大小
 56        const CELL_SIZE = 10;
 57        canvas.width = 41 * CELL_SIZE;
 58        canvas.height = 41 * CELL_SIZE;
 59
 60        // 获取颜色
 61        function getColors() {
 62            return {
 63                [Cell.Wall]: wallColorInput.value,
 64                [Cell.Path]: pathColorInput.value,
 65                [Cell.Start]: startColorInput.value,
 66                [Cell.End]: endColorInput.value
 67            };
 68        }
 69
 70        // 生成迷宫
 71        function generateMaze() {
 72            const size = parseInt(mazeSizeInput.value);
 73            progress.style.display = 'block';
 74
 75            // 使用setTimeout让UI有机会更新
 76            setTimeout(() => {
 77                const maze = new Maze(size, size);
 78                drawMaze(maze);
 79                progress.style.display = 'none';
 80            }, 0);
 81        }
 82
 83        // 绘制迷宫
 84        function drawMaze(maze) {
 85            const [width, height] = maze.getDimensions();
 86            canvas.width = width * CELL_SIZE;
 87            canvas.height = height * CELL_SIZE;
 88
 89            const colors = getColors();
 90            for (let y = 0; y < height; y++) {
 91                for (let x = 0; x < width; x++) {
 92                    const cell = maze.getCell(x, y);
 93                    ctx.fillStyle = colors[cell];
 94                    ctx.fillRect(x * CELL_SIZE, y * CELL_SIZE, CELL_SIZE, CELL_SIZE);
 95                }
 96            }
 97        }
 98
 99        // 下载迷宫图片
100        function downloadMaze() {
101            const size = parseInt(mazeSizeInput.value);
102            const link = document.createElement('a');
103            link.download = `maze-${size}x${size}.png`;
104            link.href = canvas.toDataURL();
105            link.click();
106        }
107
108        // 事件监听
109        generateButton.addEventListener('click', generateMaze);
110        downloadButton.addEventListener('click', downloadMaze);
111
112        // 颜色改变时重新绘制
113        [wallColorInput, pathColorInput, startColorInput, endColorInput].forEach(input => {
114            input.addEventListener('change', () => {
115                const size = parseInt(mazeSizeInput.value);
116                const maze = new Maze(size, size);
117                drawMaze(maze);
118            });
119        });
120
121        // 初始生成一个迷宫
122        generateMaze();
123    </script>
124</body>
125
126</html>
JavaScript代码来实现一个DFS深度优先搜索算法的迷宫生成。
  1// 迷宫单元格类型
  2const Cell = {
  3    Wall: 0,
  4    Path: 1,
  5    Start: 2,
  6    End: 3
  7};
  8
  9// 迷宫类
 10class Maze {
 11    constructor(width, height) {
 12        // 确保迷宫尺寸为奇数
 13        this.width = width % 2 === 0 ? width + 1 : width;
 14        this.height = height % 2 === 0 ? height + 1 : height;
 15
 16        // 初始化迷宫网格
 17        this.grid = Array(this.height).fill().map(() => Array(this.width).fill(Cell.Wall));
 18
 19        // 设置入口和出口位置
 20        this.start = [1, 0];  // [y, x]
 21        this.end = [this.height - 2, this.width - 1];  // [y, x]
 22
 23        // 确保入口和出口位置是路径
 24        this.grid[this.start[0]][this.start[1]] = Cell.Path;
 25        this.grid[this.end[0]][this.end[1]] = Cell.Path;
 26
 27        // 生成迷宫路径
 28        this.generatePaths(1, 1);
 29
 30        // 设置入口和出口
 31        this.grid[this.start[0]][this.start[1]] = Cell.Start;
 32        this.grid[this.end[0]][this.end[1]] = Cell.End;
 33    }
 34
 35    // 获取指定位置的单元格
 36    getCell(x, y) {
 37        if (x >= 0 && x < this.width && y >= 0 && y < this.height) {
 38            return this.grid[y][x];
 39        }
 40        return Cell.Wall;
 41    }
 42
 43    // 获取迷宫尺寸
 44    getDimensions() {
 45        return [this.width, this.height];
 46    }
 47
 48    // 获取起点坐标
 49    getStart() {
 50        return this.start;
 51    }
 52
 53    // 获取终点坐标
 54    getEnd() {
 55        return this.end;
 56    }
 57
 58    // 生成迷宫路径
 59    generatePaths(startX, startY) {
 60        const stack = [[startX, startY]];
 61
 62        while (stack.length > 0) {
 63            const [x, y] = stack.pop();
 64            this.grid[y][x] = Cell.Path;
 65
 66            // 定义四个方向:右、下、左、上
 67            const directions = [
 68                [0, 2],   // 右
 69                [2, 0],   // 下
 70                [0, -2],  // 左
 71                [-2, 0]   // 上
 72            ];
 73
 74            // 随机打乱方向
 75            this.shuffleArray(directions);
 76
 77            // 尝试每个方向
 78            for (const [dx, dy] of directions) {
 79                const nx = x + dx;
 80                const ny = y + dy;
 81
 82                // 检查新位置是否在范围内且是墙
 83                if (nx > 0 && nx < this.width - 1 && ny > 0 && ny < this.height - 1) {
 84                    if (this.grid[ny][nx] === Cell.Wall) {
 85                        // 打通路径
 86                        const midX = x + dx / 2;
 87                        const midY = y + dy / 2;
 88                        this.grid[midY][midX] = Cell.Path;
 89
 90                        // 将新位置压入栈顶
 91                        stack.push([x, y]);  // 先压入当前位置
 92                        stack.push([nx, ny]); // 再压入新位置
 93                        break; // 只处理一个方向,模拟递归行为
 94                    }
 95                }
 96            }
 97        }
 98    }
 99
100    // 辅助函数:随机打乱数组
101    shuffleArray(array) {
102        for (let i = array.length - 1; i > 0; i--) {
103            const j = Math.floor(Math.random() * (i + 1));
104            [array[i], array[j]] = [array[j], array[i]];
105        }
106    }
107}
108
109// 导出模块
110export { Maze, Cell };
程序运行非常完美,提供了生成迷宫、下载迷宫为PNG,在小朋友的建议下,增加了改变颜色的功能。
不得不感叹,Javascript的效率真高,编起来很快,运行起来更快。生成好几百个格子的迷宫,只需要一眨眼的时间。完全没有性能问题。
全文完。
怎么才能做到没有苦硬吃?
前面有人跟我说,我是探索Rust来做ADT表达式没有苦硬吃。当然Rust来搞什么树状数据机构是有点烦人的。我还给自己辩解,在工程上,当然要考虑更好的性能、更好的开发体验,但是学习和研究就应该投入足够的精力在极限场景、边缘场景。不这样,就不能更深的理解,是故君子无所不用其极。
那么,看,我又开始没有苦硬吃,把这个迷宫生成的算法用Rust来实现。并且,还要把Rust实现的算法嫁接到JavaScript中。
 1<div class="maze-app">
 2    <link rel="stylesheet" href="maze.css">
 3    <script type="module" src="maze.js"></script>
 4
 5    <div class="controls">
 6        <div class="control-group">
 7            <label>迷宫尺寸: <input type="number" id="mazeSize" value="41" min="5" max="99" step="2"></label>
 8            <button id="generateMaze">生成迷宫</button>
 9            <button id="downloadMaze">下载迷宫</button>
10        </div>
11        <div class="control-group">
12            <div class="color-picker">
13                <label for="wallColor">墙颜色</label>
14                <input type="color" id="wallColor" value="#008000">
15            </div>
16            <div class="color-picker">
17                <label for="pathColor">通道颜色</label>
18                <input type="color" id="pathColor" value="#FFFF00">
19            </div>
20            <div class="color-picker">
21                <label for="startColor">起点颜色</label>
22                <input type="color" id="startColor" value="#FF0000">
23            </div>
24            <div class="color-picker">
25                <label for="endColor">终点颜色</label>
26                <input type="color" id="endColor" value="#0000FF">
27            </div>
28        </div>
29    </div>
30    <div class="maze-container">
31        <div class="progress"></div>
32        <canvas id="canvas"></canvas>
33    </div>
34</div>
感觉上,貌似没有任何区别。
引用Rust所编制的库,在JavaScript代码中:
  1import init, { Cell, Maze } from "./pkg/hello_wasm.js";
  2
  3let maze = null;
  4let canvas = null;
  5let ctx = null;
  6
  7init().then(() => {
  8    // Initialize canvas
  9    canvas = document.getElementById("canvas");
 10    ctx = canvas.getContext("2d");
 11    const progress = document.querySelector('.progress');
 12    const downloadButton = document.getElementById('downloadMaze');
 13    const wallColorInput = document.getElementById('wallColor');
 14    const pathColorInput = document.getElementById('pathColor');
 15    const startColorInput = document.getElementById('startColor');
 16    const endColorInput = document.getElementById('endColor');
 17
 18    // Set up controls
 19    const sizeInput = document.getElementById("mazeSize");
 20    const generateButton = document.getElementById("generateMaze");
 21
 22    // Ensure odd numbers
 23    function ensureOdd(value) {
 24        return value % 2 === 0 ? value + 1 : value;
 25    }
 26
 27    // Generate new maze
 28    async function generateNewMaze() {
 29        const size = ensureOdd(parseInt(sizeInput.value));
 30
 31        // Update input value to ensure it's odd
 32        sizeInput.value = size;
 33
 34        // Show progress and disable buttons
 35        progress.style.display = 'block';
 36        generateButton.disabled = true;
 37        downloadButton.disabled = true;
 38
 39        // Use setTimeout to allow UI to update
 40        await new Promise(resolve => setTimeout(resolve, 0));
 41
 42        try {
 43            maze = new Maze(size, size);
 44            renderMaze();
 45        } finally {
 46            // Hide progress and enable buttons
 47            progress.style.display = 'none';
 48            generateButton.disabled = false;
 49            downloadButton.disabled = false;
 50        }
 51    }
 52
 53    // Download maze as PNG
 54    function downloadMaze() {
 55        if (!maze) return;
 56
 57        // Create a temporary link
 58        const link = document.createElement('a');
 59        link.download = `maze-${maze.get_dimensions()[0]}x${maze.get_dimensions()[1]}.png`;
 60        link.href = canvas.toDataURL('image/png');
 61        link.click();
 62    }
 63
 64    // Set canvas size to window size
 65    function resizeCanvas() {
 66        if (maze) {
 67            renderMaze();
 68        }
 69    }
 70
 71    // Initial setup
 72    resizeCanvas();
 73    window.addEventListener('resize', resizeCanvas);
 74    generateButton.addEventListener('click', generateNewMaze);
 75    downloadButton.addEventListener('click', downloadMaze);
 76    wallColorInput.addEventListener('change', () => maze && renderMaze());
 77    pathColorInput.addEventListener('change', () => maze && renderMaze());
 78    startColorInput.addEventListener('change', () => maze && renderMaze());
 79    endColorInput.addEventListener('change', () => maze && renderMaze());
 80
 81    // Generate initial maze
 82    generateNewMaze();
 83
 84    function renderMaze() {
 85        // Clear canvas
 86        ctx.fillStyle = "black";
 87        ctx.fillRect(0, 0, canvas.width, canvas.height);
 88
 89        var size = maze.get_dimensions()[0]; // Since width = height, we can use either
 90
 91        // 固定单元格大小为10像素
 92        const CELL_SIZE = 10;
 93        const total_size = size * CELL_SIZE;
 94
 95        // 设置画布大小
 96        canvas.width = total_size;
 97        canvas.height = total_size;
 98
 99        // Draw background
100        ctx.fillStyle = "white";
101        ctx.fillRect(0, 0, total_size, total_size);
102
103        // Draw start point
104        ctx.fillStyle = startColorInput.value;
105        ctx.fillRect(
106            maze.get_start()[1] * CELL_SIZE,
107            maze.get_start()[0] * CELL_SIZE,
108            CELL_SIZE,
109            CELL_SIZE
110        );
111
112        // Draw end point
113        ctx.fillStyle = endColorInput.value;
114        ctx.fillRect(
115            maze.get_end()[1] * CELL_SIZE,
116            maze.get_end()[0] * CELL_SIZE,
117            CELL_SIZE,
118            CELL_SIZE
119        );
120
121        // Draw walls
122        ctx.fillStyle = wallColorInput.value;
123        for (var i = 0; i < size; i++) {
124            for (var j = 0; j < size; j++) {
125                var cell = maze.get_cell(i, j);
126                if (cell === Cell.Wall) {
127                    ctx.fillRect(
128                        j * CELL_SIZE,
129                        i * CELL_SIZE,
130                        CELL_SIZE,
131                        CELL_SIZE
132                    );
133                }
134            }
135        }
136
137        // Draw paths
138        ctx.fillStyle = pathColorInput.value;
139        for (var i = 0; i < size; i++) {
140            for (var j = 0; j < size; j++) {
141                var cell = maze.get_cell(i, j);
142                if (cell === Cell.Path) {
143                    ctx.fillRect(
144                        j * CELL_SIZE,
145                        i * CELL_SIZE,
146                        CELL_SIZE,
147                        CELL_SIZE
148                    );
149                }
150            }
151        }
152    }
153});
首先是:
1import init, { Cell, Maze } from "./pkg/hello_wasm.js";
从pkg/hello_wasm.js中导入init、Cell、Maze。然后就是调用init函数,初始化Rust的代码。
1init().then(() => {
2    // 初始化完成
3});
Cell、Maze是Rust中定义的类型,用于实现具体的迷宫生成算法。
1const maze = new Maze(41, 41);
2var size = maze.get_dimension()[0];
3var start = maze.get_start();
4var end = maze.get_end();
5var cell = maze.get_cell(x, y);
大概,接口就是如此简单。Javascript中调用起来也没有多大区别。
Rust怎么生成WASM?
手工生成
Rust生成WASM的步骤,网上有很多教程。
首先,用cargo建立一个库工程,然后在Cargo.toml中把crate-type从默认的lib改为cdylib。
1[lib]
2crate-type = ["cdylib"]
这里的cdylib是表示这是一个C语言的动态链接库;另外还有lib,dylib,分别表示这是一个静态链接库和动态链接库。因为我们需要在JavaScript中调用,所以需要生成一个C语言的动态链接库。
1cargo build --target wasm32-unknown-unknown --release
这里,--target指定目标平台为wasm32-unknown-unknown,--release指定编译优化等级为release。
编译完成后,在target/wasm32-unknown-unknown/release目录下,会生成一个project_name.wasm文件。
然后,我们需要为project_name.wasm生成一个project_name.js文件。Javascript调用WASM的代码还是挺烦人的。
1async function init() {
2    const {instance } = await WebAssembly.instantiateStreaming(
3        fetch("project_name.wasm")
4    );
5     const some_function = instance.exports.some_function;
6     const result = some_function();
7     console.log(result);
8}
大概就是这类东西。当然,为了导出cdylib,所有需要导出的函数还需要标注成:
1// 保持函数名不变,不进行混淆,否则在JavaScript中调用会找不到
2#[unsafe(no_mangle)]   // Only after Rust 1.82
3pub fn some_function() -> i32 {
4    1
5}
大概,就是这类东西。还挺麻烦的。但是Rust的整个工具链都是开源的,所以有一个更加方便的工具,叫做wasm-pack。
wasm-pack
wasm-pack是一个用于将Rust编译为WASM的工具。它可以帮助我们更方便地生成WASM文件,并提供一些额外的功能。
1cargo install wasm-pack
安装wasm-pack。这样就能把Rust的代码编译为WASM,并且自动生成JavaScript的绑定文件。
在Rust代码中,要导出的函数、结构体、枚举等,需要标注成:
 1#[wasm_bindgen]
 2pub struct SomeStruct {
 3    // ...
 4}
 5
 6#[wasm_bindgen]
 7pub fn some_function() -> i32 {
 8    1
 9}
10
11#[wasm_bindgen]
12pub enum SomeEnum {
13    // ...
14}
例如,我们的迷宫生成算法代码src/lib.rs,需要导出Maze结构体和generate_maze函数。
  1//! 迷宫生成器
  2//!
  3//! 这个模块提供了一个迷宫生成器,可以生成各种尺寸的迷宫。
  4//!
  5//! 迷宫的生成算法基于DFS算法,算法首先采用递归的方式编写,然后将尾递归改为了迭代的方式。
  6//!
  7//! 迷宫的单元格类型包括:
  8//! - 墙壁
  9//! - 通道
 10//! - 起点
 11//! - 终点
 12//!
 13//! 项目编译:
 14//! ```bash
 15//! wasm-pack build --target web
 16//! ```
 17//! 生成了pkg文件夹,里面包含wasm文件、package.json文件、ts文件、js文件
 18//!
 19//! JavaScript代码示例:
 20//! ```javascript
 21//! const maze = new Maze(41, 41);
 22//! // Render the maze
 23//! const canvas = document.getElementById('canvas');
 24//! const ctx = canvas.getContext('2d');
 25//! for (let i = 0; i < maze.height; i++) {
 26//!     for (let j = 0; j < maze.width; j++) {
 27//!         const cell = maze.get_cell(i, j);
 28//!         if (cell === Cell.Wall) {
 29//!             ctx.fillRect(j * 10, i * 10, 10, 10);
 30//!         }
 31//!     }
 32//! }
 33//! ```
 34//!
 35//! 另外注意:
 36//! 1. index.html需要某种http服务器运行,否则wasm文件无法加载,例如python -m http.server
 37//! 2. 更改`lib.rs`后,重新编译,要硬刷新浏览器页面(ctrl+F5),否则浏览器不会自动更新wasm文件
 38//! 3. 浏览器中运行时,如果迷宫较大,会有载入图示,请耐心等待
 39//! 4. `.cargo/config.toml`文件中的内容必不可少,因为`getrandom`依赖的`js`需要特别处理。
 40//!5. `web-sys`提供了`console.log`模块,可以用于输出日志在浏览器中。
 41
 42use wasm_bindgen::prelude::*;
 43use rand::seq::SliceRandom;
 44use rand::thread_rng;
 45use web_sys::console;
 46
 47// 在非测试环境中,使用WebAssembly的log,
 48// `wasm-pack build --target web --dev`
 49#[cfg(not(test))]
 50#[cfg(debug_assertions)]
 51#[wasm_bindgen]
 52extern "C" {
 53    #[wasm_bindgen(js_namespace = console)]
 54    fn log(s: &str);
 55}
 56
 57// 在非测试环境中,使用WebAssembly的log,
 58//`wasm-pack build --target web`或者`wasm-pack build --target web --release`
 59#[cfg(not(test))]
 60#[cfg(not(debug_assertions))]
 61#[wasm_bindgen]
 62pub fn log(_s: &str) {}
 63
 64// 在测试环境中,使用println! 输出日志
 65// `cargo test -- --show-output`
 66#[cfg(test)]
 67pub fn log(s: &str) {
 68    println!("{}", s);
 69}
 70
 71/// 表示迷宫中的单元格类型
 72#[derive(Debug, Clone, Copy, PartialEq)]
 73#[wasm_bindgen]
 74pub enum Cell {
 75    /// 墙壁
 76    Wall,
 77    /// 通道
 78    Path,
 79    /// 起点
 80    Start,
 81    /// 终点
 82    End,
 83}
 84
 85/// 表示一个迷宫
 86#[wasm_bindgen]
 87pub struct Maze {
 88    /// 迷宫的宽度(单元格数)
 89    width: usize,
 90    /// 迷宫的高度(单元格数)
 91    height: usize,
 92    /// 迷宫的网格数据
 93    grid: Vec<Vec<Cell>>,
 94    /// 起点的坐标 [y, x]
 95    start: [usize; 2],
 96    /// 终点的坐标 [y, x]
 97    end: [usize; 2],
 98}
 99
100#[wasm_bindgen]
101impl Maze {
102    /// 创建一个新的迷宫
103    ///
104    /// # Arguments
105    ///
106    /// * `width` - 迷宫的宽度(会被调整为奇数)
107    /// * `height` - 迷宫的高度(会被调整为奇数)
108    ///
109    /// # Returns
110    ///
111    /// 返回一个新的迷宫实例
112    #[wasm_bindgen(constructor)]
113    pub fn new(width: usize, height: usize) -> Self {
114        // 确保迷宫尺寸为奇数
115        let width = if width % 2 == 0 { width + 1 } else { width };
116        let height = if height % 2 == 0 { height + 1 } else { height };
117
118        let mut maze = vec![vec![Cell::Wall; width]; height];
119
120        // 设置入口和出口位置
121        let start_x = 0;  // 左侧墙壁的右侧
122        let start_y = 1;  // 距离顶部一格
123        let end_x = width - 1;  // 右侧墙壁的左侧
124        let end_y = height - 2;  // 距离底部一格
125
126        // 确保入口和出口位置是路径
127        maze[start_y][start_x] = Cell::Path;
128        maze[end_y][end_x] = Cell::Path;
129
130        // 生成迷宫路径
131        Self::generate_paths_iter(&mut maze, 1, 1, width-1, height-1);
132
133        // 设置入口和出口
134        maze[start_y][start_x] = Cell::Start;
135        maze[end_y][end_x] = Cell::End;
136
137        Self {
138            width,
139            height,
140            grid: maze,
141            start: [start_y, start_x],
142            end: [end_y, end_x],
143        }
144    }
145
146    /// 递归生成迷宫路径
147    ///
148    /// # Arguments
149    ///
150    /// * `maze` - 迷宫网格
151    /// * `x` - 当前单元格的x坐标
152    /// * `y` - 当前单元格的y坐标
153    /// * `width` - 迷宫的有效宽度
154    /// * `height` - 迷宫的有效高度
155    fn generate_paths(maze: &mut Vec<Vec<Cell>>, x: usize, y: usize, width: usize, height: usize) {
156        // 将当前位置设为路径
157        maze[y][x] = Cell::Path;
158
159        // 定义四个方向
160        let directions = [(0, 2), (2, 0), (0, -2), (-2, 0)];
161        let mut dirs = directions.to_vec();
162        dirs.shuffle(&mut thread_rng());
163
164        // 尝试每个方向
165        for (dx, dy) in dirs {
166            let nx = x as isize + dx;
167            let ny = y as isize + dy;
168
169            // 检查新位置是否在范围内且是墙
170            if nx > 0 && nx < width as isize && ny > 0 && ny < height as isize {
171                let nx = nx as usize;
172                let ny = ny as usize;
173                if maze[ny][nx] == Cell::Wall {
174                    // 打通路径
175                    let mid_x = (x as isize + dx/2) as usize;
176                    let mid_y = (y as isize + dy/2) as usize;
177                    maze[mid_y][mid_x] = Cell::Path;
178                    log(&format!("打通路径: ({}, {}) -> ({}, {}) -> ({}, {})", x, y, mid_x, mid_y, nx, ny));
179                    Self::generate_paths(maze, nx, ny, width, height);
180                }
181            }
182        }
183    }
184
185    /// 迭代生成迷宫路径
186    ///
187    /// # Arguments
188    ///
189    /// * `maze` - 迷宫网格
190    /// * `start_x` - 起始单元格的x坐标
191    /// * `start_y` - 起始单元格的y坐标
192    /// * `width` - 迷宫的有效宽度
193    /// * `height` - 迷宫的有效高度
194    fn generate_paths_iter(maze: &mut Vec<Vec<Cell>>, start_x: usize, start_y: usize, width: usize, height: usize) {
195        let mut stack = vec![(start_x, start_y)];
196
197        while let Some((x, y)) = stack.pop() {
198            // 将当前位置设为路径
199            maze[y][x] = Cell::Path;
200
201            // 定义四个方向
202            let directions = [(0, 2), (2, 0), (0, -2), (-2, 0)];
203            let mut dirs = directions.to_vec();
204            dirs.shuffle(&mut thread_rng());
205
206            // 尝试每个方向
207            for (dx, dy) in dirs {
208                let nx = x as isize + dx;
209                let ny = y as isize + dy;
210
211                // 检查新位置是否在范围内且是墙
212                if nx > 0 && nx < width as isize && ny > 0 && ny < height as isize {
213                    let nx = nx as usize;
214                    let ny = ny as usize;
215                    if maze[ny][nx] == Cell::Wall {
216                        // 打通路径
217                        let mid_x = (x as isize + dx/2) as usize;
218                        let mid_y = (y as isize + dy/2) as usize;
219                        maze[mid_y][mid_x] = Cell::Path;
220                        log(&format!("打通路径: ({}, {}) -> ({}, {}) -> ({}, {})", x, y, mid_x, mid_y, nx, ny));
221
222                        // 将新位置压入栈顶,这样它会成为下一个处理的位置
223                        stack.push((x, y));  // 先压入当前位置
224                        stack.push((nx, ny)); // 再压入新位置
225                        break; // 只处理一个方向,模拟递归行为
226                    }
227                }
228            }
229        }
230    }
231
232    /// 获取指定位置的单元格
233    ///
234    /// # Arguments
235    ///
236    /// * `x` - 行索引
237    /// * `y` - 列索引
238    ///
239    /// # Returns
240    ///
241    /// 如果坐标有效,返回对应的单元格;否则返回 None
242    #[wasm_bindgen]
243    pub fn get_cell(&self, x: usize, y: usize) -> Option<Cell> {
244        if x < self.height && y < self.width {
245            Some(self.grid[x][y])
246        } else {
247            None
248        }
249    }
250
251    /// 获取迷宫的尺寸
252    ///
253    /// # Returns
254    ///
255    /// 返回迷宫的宽度和高度 [width, height]
256    #[wasm_bindgen]
257    pub fn get_dimensions(&self) -> Vec<usize> {
258        vec![self.width, self.height]
259    }
260
261    /// 获取起点的坐标
262    ///
263    /// # Returns
264    ///
265    /// 返回起点的坐标 [y, x]
266    #[wasm_bindgen]
267    pub fn get_start(&self) -> Vec<usize> {
268        self.start.to_vec()
269    }
270
271    /// 获取终点的坐标
272    ///
273    /// # Returns
274    ///
275    /// 返回终点的坐标 [y, x]
276    #[wasm_bindgen]
277    pub fn get_end(&self) -> Vec<usize> {
278        self.end.to_vec()
279    }
280}
281
282#[cfg(test)]
283mod tests {
284    use super::*;
285
286    #[test]
287    fn test_maze_generation() {
288        let maze = Maze::new(41, 41);
289        assert_eq!(maze.get_dimensions(), vec![41, 41]);
290        assert_eq!(maze.get_start().len(), 2);
291        assert_eq!(maze.get_end().len(), 2);
292
293        // 打印迷宫,注意坐标顺序:y是行,x是列
294        for y in 0..maze.height {
295            for x in 0..maze.width {
296                match maze.get_cell(y, x) {  // 注意这里交换了x和y的顺序
297                    Some(Cell::Wall) => print!("██"),
298                    Some(Cell::Path) => print!("  "),
299                    Some(Cell::Start) => print!("S "),
300                    Some(Cell::End) => print!("E "),
301                    None => print!("? "),
302                };
303            }
304            println!();
305        }
306    }
307}
最终运行:
1wasm-pack build --target web
这里,--target web指定目标平台为Web。编译完成后,在pkg目录下,会生成一个project_name_bg.wasm文件和project_name.js文件。我们只需要把project_name_bg.wasm文件和project_name.js文件拷贝到JavaScript项目中,就可以直接在JavaScript中调用Rust的代码了。
就在maze.js中,我们就可以看到:
1import init, { Cell, Maze } from "./pkg/project_name.js";
整个过程非常丝滑。当然,在本地直接打开html看不到效果,必须是某种方式的部署,最简单的就是用http-server。
1python -m http.server --bind localhost 8080
然后,在浏览器中打开http://localhost:8080/maze.html,就可以看到效果了。
当然,每次我们更改了代码,重新编译wasm并生成js文件之后,就需要重新加载页面(硬重载,大概是Ctrl+F5),浏览器才会重新加载wasm文件。
结论
Rust生成WASM,使用wasm-pack是最方便的。参考wasm-pack。虽然我还是没有太看到是否用Rust来生成WASM的必要性……
文章标签
|-->rust |-->wasm |-->javascript |-->game |-->maze |-->DFS algorithm |-->迷宫生成
- 本站总访问量:loading次
- 本站总访客数:loading人
- 可通过邮件联系作者:Email大福
- 也可以访问技术博客:大福是小强
- 也可以在知乎搞抽象:知乎-大福
- Comments, requests, and/or opinions go to: Github Repository